
It turns out that when I installed my Cobb springs I did not align the top hat with the flange on the bottom of the front passenger strut, this 2" gap did not allow the strut to move around when taking corners. This resulted in the strut 'popping' under load and just a overall bad feel while driving the car. Saturday morning I removed the strut, tore it apart, fixed the alignment issue, then stuck it back on the car. The end result was a leveled front-end, no more popping and the handling of the car feels as it should now. Now that the car sits lower I can no longer simply stick my lift under the car to place jacks under it. Instead I have to drive it up a few inches on ramps to get enough clearance to get the lift under the car. I can only go up a few inches though, anything more and the front-end will scrap the ramps themselves. I will need to invest in some ramps with less of a angle. urgh!
This shows how far I could drive the car onto the ramps before the front end would hit. Note that the car is resting on the jack in the picture.
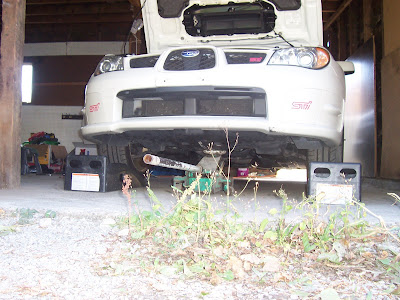


This shows how far I could drive the car onto the ramps before the front end would hit. Note that the car is resting on the jack in the picture.

Car is resting on jacks....


This is the strut directly after being taken off the car. Can you spot whats wrong with it? I noticed before I had it out of the car. If you look at the section closest to the camera you will see a indent on the metal top hat (the piece below the hard plastic piece with the three bolts sticking out). That indent needs to be aligned with the two metal pieces sticking upwards at the bottom of the strut. If you look at the metal piece alone you will see that it is not a solid circle but it's got a strange angle to it.

Before you start to remove the top hat make sure you stick spring compressors on the spring otherwise you will get injured!

Here is the strut completely taken apart. To put it all back together you will need to put the spring compressors back on the spring. The spring itself will need to be compressed more then when you took it out so you can actually thread the 17MM bolt at the top. Make sure you compress the spring evenly, as I learned if you don't do this you will be trying to do the impossible.

The strut property assembled, notice the indent is now aligned and the top plastic hat is able to rotate freely.


The strut installed in the car (Yes, I know, dirty Brembo's)

The final product...


1 comment:
Looks a lot better man. Good work!
Post a Comment