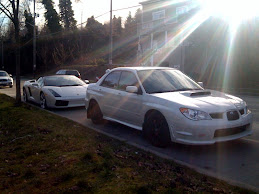
 When I first bought my STi the exhaust note left something to be desired, so around 8K miles I upgraded to the SPT cat-back exhaust. I did this to not void my warranty since this is a Subaru exhaust. Now at almost 35K miles and my warranty being up it was time to upgrade my exhaust yet again, but this time it would be the last exhaust upgrade on this specific car. I ended up going with the Agency Power TBE (Turbo back exhaust). This system replaces the entire exhaust system from the turbo all the way to the exhaust tip. This exhaust is by far the loudest system I've ever owned, and no, it does not sound like a honda or ricer what-so-ever. This exhaust provides a deep rumble. I will say that I did loose a little bit of the Subaru 'boxer' sound due to the downpipe being replaced but the deep rumble makes up for it and then some. At times the exhaust note is too loud for comfort but this is just something I have to deal with if I want to keep increasing the cars power.
I started off by getting the car up on jacks and letting it cool down for an hour or so.

The SPT cat-back that has been on the car for almost 30K miles:


The new TBE straight out of the packaging. Sexy ain't it?


The first step I did for the install was to remove the rear diffuser. There are 5 12MM bolts that need to be removed. You will need a 12MM deep socket to get at the bolts. I removed the diffuser to gain access to one of the bushings that was holding the muffler in place.


I don't have pictures of the next few steps but I removed the bolts from the downpipe and mid-pipe (two 14MM bolts/nuts). I applied PB blaster to the bolts/nuts prior to touching them. Once the bolts were removed I went to the muffle and remove the two rubber bushings from the mounting points on the car, I left the bushings connected to the exhaust. I had to use a couple flat head screwdrivers to get the bushing loose. The bushing on the driver side is unique in that you have to remove a bolt to get the bushing free however the nut is welded to the mounting bracket. Once the end of the exhaust and the mid-pipe to downpipe were free all that was left as another bushing in the center of the mid-pipe. Again, I used a flat head screw driver to pry it free and the entire exhaust then fell on top of me (what a surprise!)

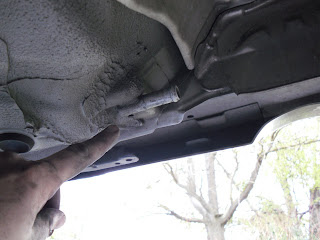
The cat-back (Axel-back/muffler and mid-pipe) have been removed. Notice my sweet 22MM adjustable sway-bay and end-links.


The entire SPT cat-back exhaust:

Now it's time to remove the heat shield housing that sits above the turbo/Downpipe. This was one of the most difficult parts of the install for me. I decided to not remove my intercooler and work around this. This made removing the 5 bolts that mount the shield very difficult to get too. On top of that once the bolts have been removed the housing has to be pushed apart to fit over the turbo, with the intercooler in the I had to rotate and tug like no tomorrow before it finally came loose.


Here is the turbo and downpipe exposed after the heat shield has been removed. There is still a mounting bracket for the heat shield present, this must be removed but required the top two bolts that connect the downpipe to the turbo to be removed.

At this point I've got the downpipe broken apart from the turbo. To do this I loosened all 5 bolts that connect the turbo to the downpipe then I had to crawl under the car and loosen the two bolts that mount the downpipe to the car. At that point I could move it around freely.


The downpipe removed from the car. The stock downpipe is actually two pieces but I didn't want to break the bolts connected the two pieces together. I also had to remove the O2 sensor before I could get out. I picked up a specific tool for just that at the auto parts store down the road from my house.

View from up top after the downpipe has been removed.
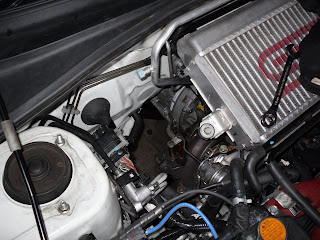

...And the view from the bottom


New downpipe is in place. I've placed a few bolts to keep it from falling but I won't be torquing anything until the entire system has been installed.


The agency power downpipe includes this little welded on pipe for the O2 senser. I used a small packet of Anti-Seize on the sensor itsefl before the install. Again, I had to use a special tool to install the sensor, however I think a 22MM wrench could also be used to install this sensor.


Mid-pipe has been put in place. There is a bushing that sits in the middle of the pipe. I attached that first and let it hang while I stuck the gasket in place and placed the bolts. Again, I did not torque anything down as of yet.


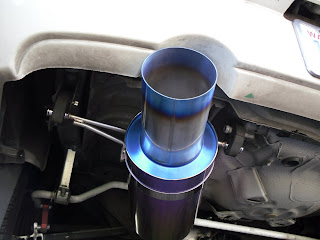
And finally we attached the Axel-back, I used the same type of gasket between the mid-pipe and Axel-back followed by two 14MM bolts/nuts. This section mounts to the car with a supporting piece that wraps the muffler.


What the people behind me see, hear, and feel. :)
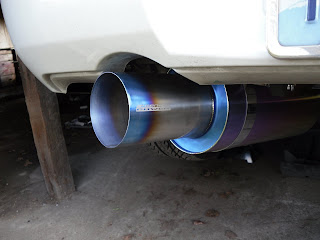
Pictures here is the stock and SPT cat-backs with the stock downpipe in the middle:


... And I end with this myself feeling good after the install is complete. The job took me a little over 4 hours from getting the car on jacks to taking it for a test drive.
